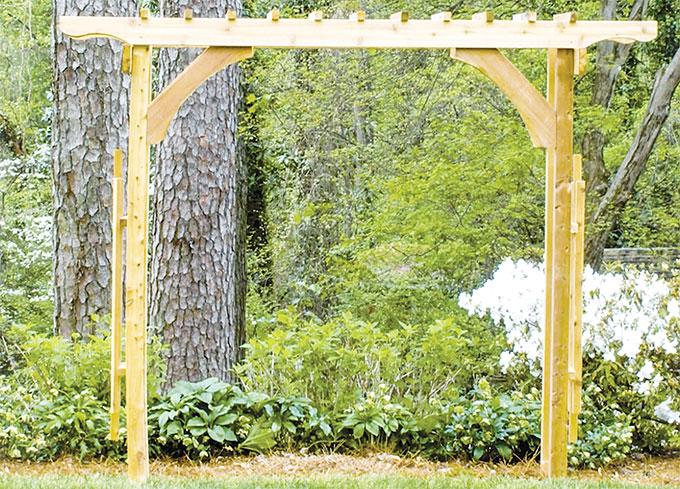
Are you dreaming about beautifying your backyard? Is your garden in need of some color and dimension? If you have the tools, a free weekend and the initiative, you can add charm and beauty to your outdoor space by building a garden trellis.
Here’s everything you need, and everything you need to know, to complete this Done-In-A-Weekend Project from Exmark, a leading manufacturer of lawn care equipment.
TOOLS:
• Table saw
• Circular saw
• Jig saw
• Orbital sander
• Drill/driver and bits
• Tape measure
• Pencil
• Sawhorses/worktable
• Eye and ear protection
MATERIALS:
• 3 2-inch by 4-inch x 8-foot cedar
• 4 4-inch by 4-inch x 8-foot cedar posts
• 2 2-inch by 8-inch x 8-foot cedar (for the corbels)
• 1 2-inch by 6-inch x 6-foot cedar (side bracket/beam support)
• 2 2-inch by 6-inch x 10-foot cedar beams
• 4 post brackets (optional, to attach to wood deck)
• 2.5-inch deck screws
• 1.25-inch deck screws
• Wood stain
• Wood sealer
• Wood glue
INSTRUCTIONS:
1. Cut boards down to size for the sides, top trellis and corbels
2. Assemble the side sections
3. Assemble the top trellis section by following the template found at backyard.exmark.com or by sketching your own design onto card stock
4. Attach the top and sides of the trellis, ensuring the sections are square with one another
5. Use the template to build the corbels
6. Line corbels flush with the side posts and attach
7. Apply wood sealer, and stain or paint (if desired)
To download the complete instructions and template, and to follow along with the video tutorial, visit Exmark’s Backyard Life site at backyard.exmark.com, a multimedia destination providing homeowners with everything from grilling tips to gardening advice.
While this beautiful trellis is a bit of work, once complete, it can provide structure for vining plants to grow, create a bit of shade from the harsh summer sun or simply serve as a point of architectural interest in your garden.
This article is courtesy of Statepoint Media.
