The easy, inexpensive way to rack it up
It seems like I am always in a constant battle to keep my home clutter-free. Yet, somehow, items keep piling up, and closet space keeps running out.
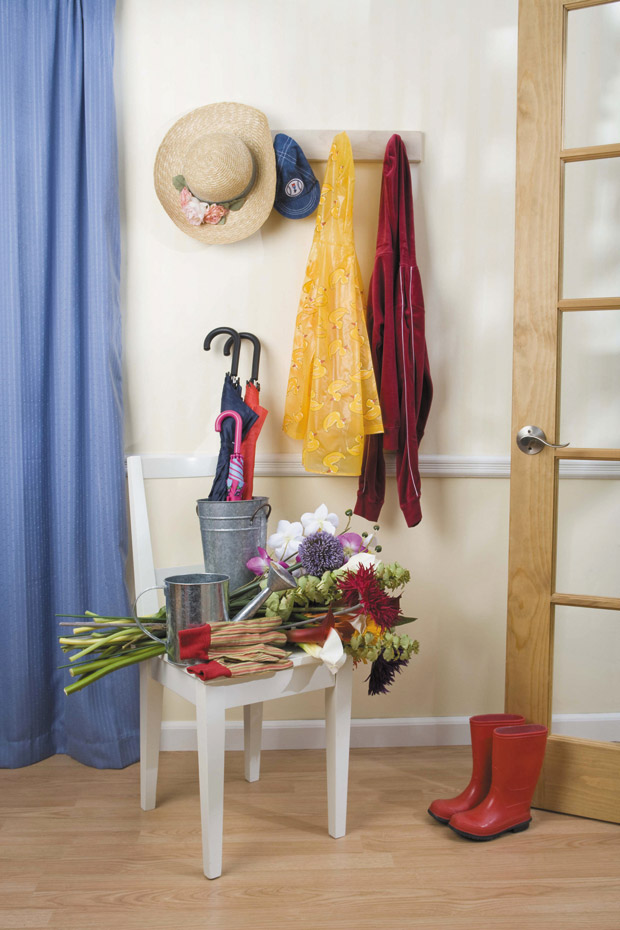
To help find space elsewhere, I have been using over-the-door racks for some of my regular sweaters, bags and hats. However, what I have come to realize over the years is that these over-the-door racks are not that great.
The racks make doors just a bit harder to shut than when they are rack-free. Plus, when I inevitably hang too much on them, they bend. I have replaced over-the-door racks one too many times. What I have not had to replace, however, has been the one wall-mounted rack I put up a couple of years ago. No matter how much I pile on, it does not bend or break.
When my last over-the-door rack gave out, I decided to go for a wall-mounted rack instead. The problem was, I could not find one that I liked. Luckily, making your own wall-mounted rack is easy and inexpensive to do.
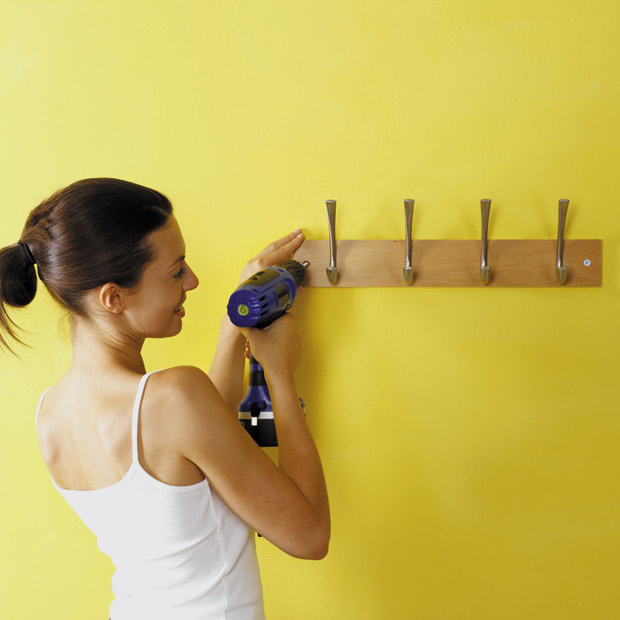
First, gather your materials. Decide on a backing. If you would like a wooden rack, look for 1 X 6 lumber, and have it cut to your desired length. Purchase coat hooks or other items to use as hooks, such as drawer pulls. Purchase enough so that you can space them at about 4 to 9 inches apart on the backing. You will also need a drill, screwdriver, measuring tape, a stud finder, wood screws or wall anchors and screws, and screws for your hooks/pulls.
How you space your hooks will depend on how you plan to use them. For scarves and smaller items, they can be closer together. For larger items, you will want them farther apart. Just make sure to keep the spacing consistent. Place the hooks on the backing, and mark the spots with a pencil. Drill pilot holes on the markings. Then, if desired, sand and paint or stain the backing. Wait for the paint to dry completely before proceeding.
Attach the hooks with the screws that came with them and a screwdriver, inserting them into your pre-drilled holes. If your pulls or hooks did not come with screws, you may need to purchase some. Just make sure the screws you purchase are not too long for the backing.
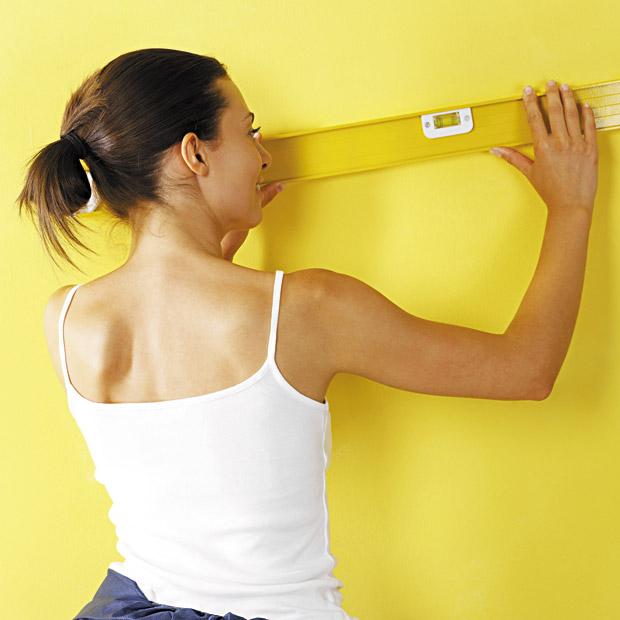
Use your stud finder to find the studs on your wall. Then, drill the rack directly into the wall using the wood screws. If you cannot find studs, use wall anchors instead.
Have a question or comment for Joanne? Email her at thefixisinhawaii@gmail.com.