Have you changed your mind about the picture frames you hung on the wall? By using spackling filler that can be painted over, filling nail holes is easy
I have moved around quite a bit. From college to internships, to jobs and roommate switches, I’ve had to get creative with decorations and room arrangements to make each space feel a little more like home. No matter the place, there are certain staples that always travel with me, the most important of which are pictures of my friends and family.
Up until recently, I’ve relied on bookshelves, countertops and ledges to lean my frames against. I never wanted to risk making a big commitment by putting nails in the wall. Last year I took the plunge and hung a group of frames in the bedroom. Six months later I changed my mind about the placement and took them down. The nails sat nailed in until just last week when we decided to take another leap: paint.
I’ve never had to deal with filling in nail holes before, but thought the job would be easy enough. I bought some joint compound and filled in the holes using a plastic spoon to smooth them over.
When the compound dried, I assumed I could sand it down and it would be perfect. Unfortunately, the sanding did not smooth the holes enough to paint. I learned the hard way, but now I know how to do it properly.
First, make sure to purchase the correct filler. I used spackling/nail hole filler meant for interior or exterior. It says right on the package if it’s meant to be painted over. Ask a sales associate if you are unsure. Also, make sure you have the necessary tools. These include a utility knife, putty knife and 180-grit sandpaper sponge.
Take the utility knife and cut out any excess wallpaper or loose edges on or around the hole. This step is crucial. You don’t need to cut much, just trim any excess.
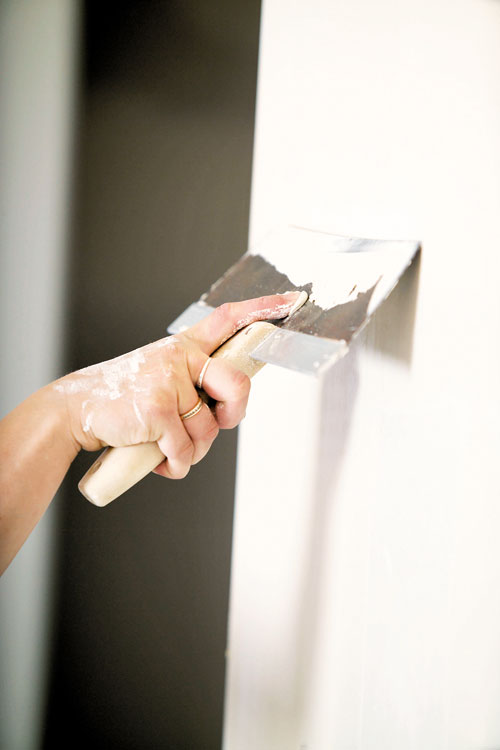
Then, use a putty knife to fill and smooth over the hole with the joint compound. Place the compound on the knife and pull across the hole slowly to fill it. Take the knife at a 90-degree angle against the wall and run it across the area to remove any excess compound. Make sure it is filled completely, and apply a second coat if necessary.
Allow it to dry thoroughly. In my case, I knew the compound was dry when it turned from pink to white. Use the sandpaper sponge to sand the area so that it is flush with the wall. If your paint doesn’t have a built-in primer, prime it before painting.